Taste of Scotland: The Enduring Charm of Authentic Homemade Raisin Scones
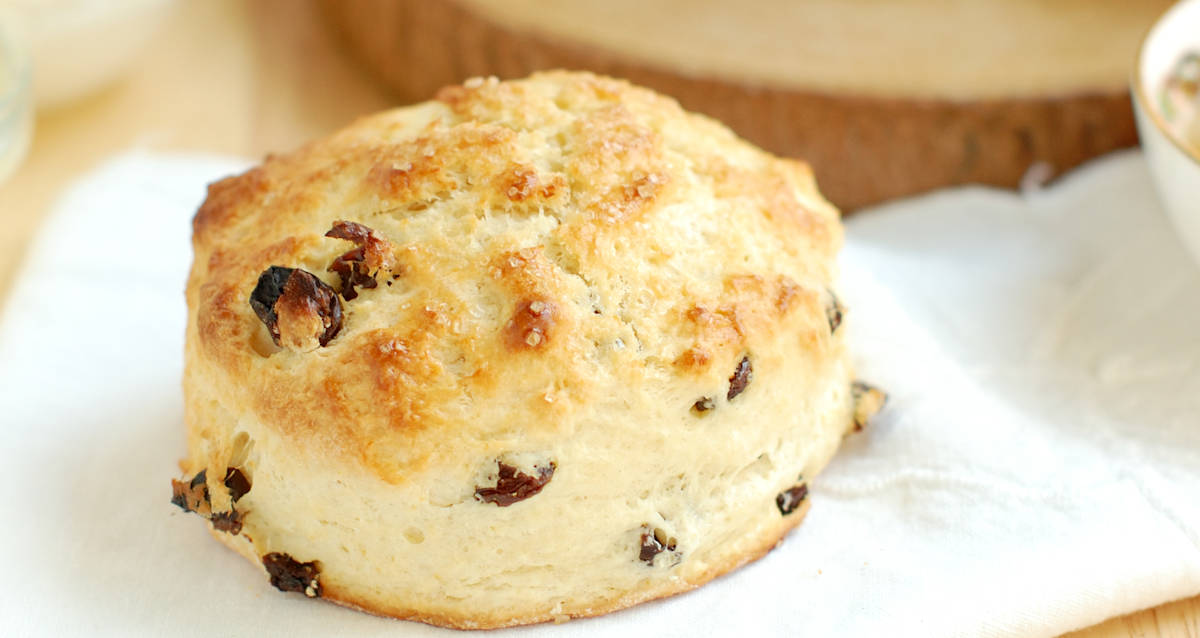
There's a unique comfort in a freshly baked scone, a simple yet profoundly satisfying treat that instantly transports you. For many, the very mention of a scone conjures images of cozy Scottish tearooms, windswept landscapes, and the warmth of a homemade classic. Our journey begins with the quintessential
raisin scone – a beloved staple that holds a special place in the heart of Scottish baking. It's a taste of tradition, a memory for those who've experienced it firsthand, and a delightful discovery for newcomers. As one enthusiast beautifully put it, eating these can feel "like being back in Scotland!" This article will guide you through crafting these authentic homemade raisin scones, ensuring a taste of that cherished Scottish heritage right in your own kitchen.
The Heart of Scottish Baking: Why Raisin Scones Endure
The enduring appeal of the
raisin scone lies in its humble elegance and incredible versatility. Far from being overly sweet or elaborate, a true Scottish scone celebrates the quality of its simple ingredients and the deftness of its preparation. It’s meant to be enjoyed warm, perhaps split and generously spread with clotted cream and a dollop of berry jam, or simply with a cup of strong tea. These are not the overly rich, cake-like scones sometimes found in other traditions; rather, they are designed to be light, fluffy, and just slightly crumbly, providing the perfect canvas for your chosen accompaniments.
The secret to their enduring popularity also lies in their accessibility. Made from everyday pantry staples, they don't require fancy equipment or advanced pastry skills. What they do demand, however, is attention to a few crucial techniques that unlock their distinct texture and flavor. Understanding these nuances is key to moving beyond just a recipe and truly mastering the art of the authentic
raisin scone.
Mastering the Perfect Raisin Scone: Key Ingredients & Techniques
Crafting exceptional
raisin scones is less about following a rigid formula and more about understanding the interaction of ingredients and the impact of your touch. We'll combine the best practices from traditional Scottish baking, drawing insights from revered recipes, to ensure your scones rise beautifully and boast that irresistible tender crumb.
Essential Ingredients for Authentic Raisin Scones
The beauty of a classic scone recipe lies in its simplicity. Each ingredient plays a vital role:
*
All-Purpose Flour (2 cups): The structural backbone. Use good quality, unbleached flour for the best results.
*
Leavening Agents: This is where tradition shines.
*
Baking Soda (1/4 teaspoon): A base that reacts with the acidity of buttermilk.
*
Cream of Tartar (1 1/2 teaspoons): The acid component that activates the baking soda, creating air pockets for a fluffy rise. This combination is a hallmark of many traditional scone recipes, offering a more controlled and often superior rise compared to pre-mixed baking powder.
*
A Pinch of Salt: Essential for enhancing all the other flavors.
*
Chilled Unsalted Butter (8 tablespoons / 1 stick), cut into small pieces: This is paramount. Cold butter, cut into small pieces, or even better, grated frozen butter, creates pockets of steam as it melts in the oven. This steam pushes the dough upwards, resulting in those coveted flaky layers. Using unsalted butter allows you to control the salt content.
*
Raisins (1/2 cup): The star of the show! Opt for plump, good-quality raisins. You can rehydrate them in warm water for 10 minutes and then pat dry if they seem a bit dry. While optional for some, they are central to our "raisin scones" theme.
*
Large Egg (1), beaten: Adds richness, helps bind the dough, and contributes to a tender crumb.
*
Buttermilk (approximately 1/2 cup): The magic liquid. Its acidity reacts with the leavening agents, and it tenderizes the dough, yielding a wonderfully soft texture. Start with 1/2 cup and add a little more if needed, just until the dough comes together.
*
For the Glaze:
*
Egg Yolk (1): Provides a rich, golden color.
*
Lukewarm Water (1 tablespoon): Thins the yolk for an even brush.
Step-by-Step Guide to Homemade Raisin Scones
Follow these steps carefully to achieve light, tender, and authentic
raisin scones:
1.
Preheat Your Oven: Set your oven to a hot 425°F (220°C). A high initial temperature is crucial for a rapid rise, giving your scones that desirable lift. Grease two baking sheets or line them with parchment paper.
2.
Combine Dry Ingredients: In a large mixing bowl, thoroughly whisk together the flour, baking soda, cream of tartar, and salt. Ensure they are well combined for even distribution of leavening.
3.
Incorporate the Butter: Add the chilled butter pieces to the dry ingredients. Using your fingertips, a pastry blender, or even a food processor on pulse, cut the butter into the flour mixture until it resembles coarse crumbs, with some pea-sized pieces remaining.
Pro tip: Grating frozen butter directly into the flour mixture makes this step incredibly easy and ensures consistent small pieces, which is excellent for flakiness.
4.
Add Raisins and Wet Ingredients: Stir in the raisins gently. Create a well in the center of the flour and butter mixture. Pour in the beaten egg and about half of the buttermilk. Using a fork or your hands, begin to mix the ingredients from the center outwards, gradually incorporating the dry mixture. Add the remaining buttermilk a little at a time, just until a soft, shaggy dough forms. Be careful not to add too much liquid; the dough should be slightly sticky but manageable.
5.
Light Kneading and Shaping: Turn the dough out onto a lightly floured surface.
Knead very lightly – no more than 4-5 gentle folds – just enough to bring the ingredients together and form a cohesive ball. Over-handling develops gluten, leading to tough scones, and deflates the air pockets you've worked so hard to create.
6.
Roll and Cut: Gently pat or roll the dough to a thickness of about 1/2 inch. Using a sharp knife or a round cutter (dipped in flour between cuts to prevent sticking), cut the dough into 8 thick wedges or round shapes. If using a cutter, try to cut straight down without twisting to ensure a good rise.
7.
Arrange on Baking Sheets: Carefully transfer the scones to your prepared baking sheets, leaving about a 1/2-inch space around each one.
8.
Prepare and Apply Glaze: In a small bowl, whisk together the egg yolk and lukewarm water to create a uniform glaze. Gently brush the tops of each scone with this mixture. Be mindful not to let any glaze drip down the sides onto the baking sheet, as this can cause the scones to stick and inhibit their rise.
9.
Bake to Golden Perfection: Place the baking sheets in your preheated oven. Bake for 12-15 minutes, or until the scones are beautifully golden brown on top and have risen impressively. The exact time may vary slightly depending on your oven.
10.
Serve Warm: Remove the scones from the oven and let them cool slightly on a wire rack. Serve them warm, ideally with a generous dollop of clotted cream or whipped cream and your favorite berry jam.
Tips for Fluffy, Golden Raisin Scones Every Time
Achieving consistently perfect
raisin scones is a rewarding endeavor. Here are some additional insights and practical tips to elevate your baking:
*
Keep it Cold: The colder your butter, and even your buttermilk, the better your scones will rise and become flaky. Some bakers even chill their flour before starting!
*
Don't Overmix or Overwork: This cannot be stressed enough. A light hand is the scone baker's best friend. Overmixing develops gluten, which leads to dense, tough scones instead of light, tender ones. Mix just until the ingredients come together. For a deeper dive into achieving that perfect rise, check out our guide on
Perfect Raisin Scones: The Secret to a Fluffy Rise.
*
The Buttermilk Factor: If you don't have buttermilk on hand, you can make a quick substitute by adding 1 tablespoon of white vinegar or lemon juice to a measuring cup and filling the rest of the way to 1/2 cup with regular milk. Let it sit for 5-10 minutes until it slightly curdles.
*
Raisin Preparation: While optional, plumping your raisins in warm water for about 10 minutes (then draining and patting dry) can make them extra juicy and prevent them from drying out during baking.
*
Experiment with Sweetness: Traditional Scottish scones are not overly sweet. The sweetness comes primarily from the raisins and any jam or cream served alongside. However, if you prefer a slightly sweeter scone, you can add 1-2 tablespoons of sugar to your dry ingredients.
*
Variations Beyond Raisins: While our focus is on authentic
raisin scones, feel free to experiment once you've mastered the basic technique. A pinch of cinnamon, some orange zest, or other dried fruits like cranberries or currants can add delightful twists.
*
Storage and Reheating: Scones are best enjoyed fresh, warm from the oven. However, leftovers can be stored in an airtight container at room temperature for up to 2 days. To refresh, gently warm them in a low oven (around 300°F/150°C) for 5-10 minutes. Unbaked scones can also be frozen for later use. Arrange them on a baking sheet and freeze until solid, then transfer to a freezer-safe bag. Bake from frozen, adding a few extra minutes to the baking time.
*
Comparing Baking Methods: There are various approaches to baking scones, from traditional methods like ours to more modern, simplified versions. If you're curious about the different approaches to these delightful treats, explore our comparison of
Raisin Scone Recipes: Comparing Classic & Modern Baking Methods.
Serving Suggestions for Your Authentic Raisin Scones
No discussion of
raisin scones would be complete without considering how to serve them. The classic accompaniments are:
*
Clotted Cream: A thick, rich cream from Cornwall or Devon, often considered essential for a proper cream tea.
*
Good Quality Jam: Strawberry, raspberry, or blackcurrant preserves are traditional choices.
*
Butter: For a simpler, yet equally delicious experience.
*
A Hot Beverage: Strong black tea (Earl Grey or Scottish Breakfast blend are perfect) or a good cup of coffee.
The traditional way to eat a scone is to break it in half by hand (never cut with a knife!), spread with jam first, then cream – or vice versa, depending on your regional preference!
Conclusion: Bring the Taste of Scotland Home
Baking authentic homemade
raisin scones is more than just following a recipe; it’s an invitation to experience a piece of Scottish culinary heritage. With careful attention to cold ingredients, minimal handling, and a hot oven, you can create light, fluffy, and tender scones that taste just like those enjoyed in the Highlands and Lowlands. Gather your ingredients, prepare your kitchen, and embark on this delicious journey. The aroma of freshly baked scones filling your home is a reward in itself, and the first bite, a true taste of Scotland. Enjoy the simple pleasure of these timeless treats, a perfect accompaniment to any moment of quiet indulgence.